
Today I will show you how easy it is to have Blogger (Blogspot) display profile images in the embedded comments section of your blog even if you are using a custom template.
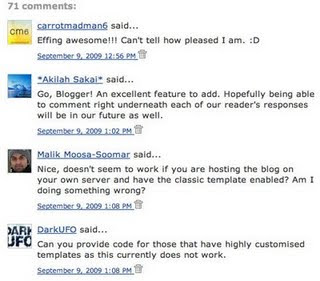
About a month ago Blogger announced that it was enabling profile images (profile avatars) in the embedded comments section on Blogger (Blogspot) as part of its 10th birthday feature series. The new profile image feature which has been available on other commenting options has now been extended to the embedded comments option. This is good news if you are using a default template as you will now see a small avatar next to your visitors comments and your own avatar if you have uploaded a profile image.
Default Blogger Templates - Enabling Profile Images
Profile images work on default Blogger templates and have been automatically enabled by Blogger. If you are using a default Blogger template with embedded comments enabled and have recent comments on a post you will see a profile image to the left of visitor comments (provided they have uploaded one that is). Your profile avatar will also display when you respond to visitor comments again provided you have uploaded one. (To upload your profile photo click on Add Photo at the Dashboard). If profile images are not displayed enable them by going to Settings > Comments and checking the Yes radio button at the bottom of the page which says Profile Images Enabled.
Custom Blogger Templates - Enabling Profile Images
If you are using a custom template you may still be able to see profile images in your embedded comments section. Check out Settings > Comments to make sure Profile Images are enabled. If you can't see profile images you can still add this feature by tweaking your Blogger template. Follow the instructions below to have Blogger display profile images in the embedded comments section of your custom Blogger template.
Add Profile Images to Comments Section of a Custom Blogger Template
If you are using a custom Blogger template you can use the following method to add profile images to the embedded comments section of your Blogger template.
Tips and Troubleshooting
In today's Blogger tutorial (Blogspot tutorial) you have learned how to enable profile images in the embedded comments section in Blogger. If you are using a default Blogger template this can be achieved by enabling profile avatars in your Blogger template. If you are using a third party custom template I have shown you a Blogger hack that will display profile images next to comments on your blog. As always I am interested in how you get on with this tweak. Good luck!
Related Articles
List of Blog Know How Tutorials for Blogger Blogs
Add Missing Embedded Comments Section to a Blogger Template
Embed Comments Form in a Blogger Template
How to Get More Comments on a Blogger Blog
About a month ago Blogger announced that it was enabling profile images (profile avatars) in the embedded comments section on Blogger (Blogspot) as part of its 10th birthday feature series. The new profile image feature which has been available on other commenting options has now been extended to the embedded comments option. This is good news if you are using a default template as you will now see a small avatar next to your visitors comments and your own avatar if you have uploaded a profile image.

Default Blogger Templates - Enabling Profile Images
Profile images work on default Blogger templates and have been automatically enabled by Blogger. If you are using a default Blogger template with embedded comments enabled and have recent comments on a post you will see a profile image to the left of visitor comments (provided they have uploaded one that is). Your profile avatar will also display when you respond to visitor comments again provided you have uploaded one. (To upload your profile photo click on Add Photo at the Dashboard). If profile images are not displayed enable them by going to Settings > Comments and checking the Yes radio button at the bottom of the page which says Profile Images Enabled.
Custom Blogger Templates - Enabling Profile Images
If you are using a custom template you may still be able to see profile images in your embedded comments section. Check out Settings > Comments to make sure Profile Images are enabled. If you can't see profile images you can still add this feature by tweaking your Blogger template. Follow the instructions below to have Blogger display profile images in the embedded comments section of your custom Blogger template.
Add Profile Images to Comments Section of a Custom Blogger Template
If you are using a custom Blogger template you can use the following method to add profile images to the embedded comments section of your Blogger template.
- Login to Blogger if not already logged in
- Go to Design > Edit HTML
- Back up your Blogger template as a precaution by downloading the full template to your computer
- Expand Widget Templates by checking the box on the right hand side
- Find the following line in your Blogger template by using CTRL + F:
<dl id='comments-block'>
- Change the above line to the following:
<dl expr:class='data:post.avatarIndentClass' id='comments-block'>
- Scroll down a few lines and find the following line in your Blogger template:
<a expr:name='data:comment.anchorName'/>
- Directly before the above line paste the following code block:
<b:if cond='data:comment.favicon'>
<img expr:src='data:comment.favicon' height='35px' style='margin-bottom:-2px;' width='35px'/>
</b:if>
<a expr:name='data:comment.anchorName'/>
<b:if cond='data:blog.enabledCommentProfileImages'>
<data:comment.authorAvatarImage/>
</b:if> - Click Save Template
- Click View Blog and navigate to a page with commenting to see avatars next to comments in the embedded comments area
Tips and Troubleshooting
- If you have added the author commenting highlight hack to your Blogger template there will be 2 instances of the code at Step 7 to change
- If your template does not have the code mentioned in Step 5 and Step 6 check that dl has not be replaced by div. In this case leave the div as is and replace the rest of the code in the line.
- Blogger has only enabled profile images for Blogger and Google profiles so if your visitors comment using identities such as "Anonymous" or "Name/URL" their image profile will not be displayed. If OpenID, AIM or other identities are used these favicons will be displayed instead.
- Profile avatars load last so they will not prevent visitors viewing your content if you have a lot of comments on some pages
In today's Blogger tutorial (Blogspot tutorial) you have learned how to enable profile images in the embedded comments section in Blogger. If you are using a default Blogger template this can be achieved by enabling profile avatars in your Blogger template. If you are using a third party custom template I have shown you a Blogger hack that will display profile images next to comments on your blog. As always I am interested in how you get on with this tweak. Good luck!
Related Articles
List of Blog Know How Tutorials for Blogger Blogs
Add Missing Embedded Comments Section to a Blogger Template
Embed Comments Form in a Blogger Template
How to Get More Comments on a Blogger Blog
Comments
Post a Comment